| |
 |
|
|
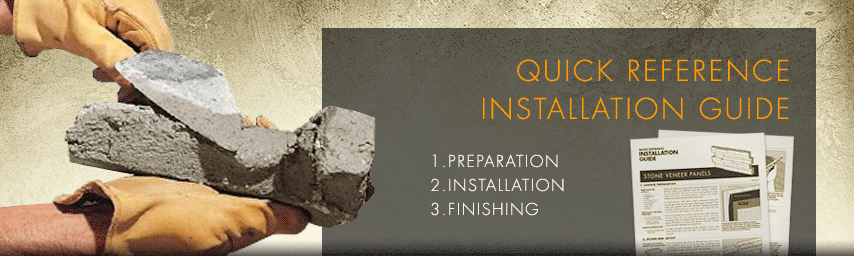
Stone
Veneer Installation |
Published
by: MG Home © 2009 |
|
|
Rigid
backwall surfaces:
• Plywood
• Wallboard
• OSB
• Concrete Board
• Panel Board
• Concrete
• Masonry
• Stucco
• Backerboard
• Greenboard
Waterproof substrate
Materials:
• Felt Grade Roofing
Paper
• Waterproof building
paper
• Housewrap
Reinforced Metal
Lath :
Galvanized expanded
metal lath
|
|
Prepare
the rigid back wall by reinforcing
the wall structure for strong
structural support and additional
stone load. Adding a substrate
barrier is required for all interior
and exterior wall applications
using mortar. This barrier will
prevent moisture, corrosion and
weather elements from penetrating
beyond the veneer layer.
For interior/exterior walls: Nail
or staple weatherproof roofing
felt over the entire back wall
and corners where veneer is planned.
Then cover with expanded metal
lath. Minimum 18-gauge galvanized
expanded diamond mesh or woven
wire mesh. Fasten lath with corrosion-resistant
nails, staples, or concrete nails.
If you are working from an existing
wall, be sure to clean off surface
of loose debris. Fix any questionable
areas of the wall to be structurally
sound. For exterior walls, pressure-wash
or sandblast or scrape off surface
so it is free of oil, grease or
old paint. Securely attach expanded
metal lath over cleaned area.
For clean, untreated, unpainted
concrete, masonry or stucco walls:
Clean surface free of oil and
debris. No further preparation
is necessary.
|
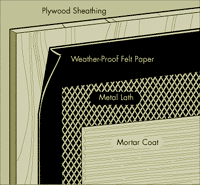
To
prevent damage from weather
elements, weather-proof
construction felt paper
is installed over the back
wall surface. A metal lath
layer is added to increase
the integrity of the mortared
wall from movement and cracking. |
|
|
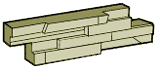
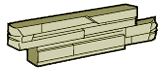
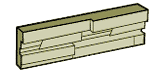
Great
looking design takes planning.
Although stone veneer products
have simplified much of the process
from traditional stone installations,
it is still important to pay attention
to the way the stones are arranged
in order achieve a visually pleasing
design.
For the best possible results,
begin your design by spreading
out as many veneer pieces on the
ground so that you have a good
variety of shapes and colors to
choose from. Assemble them as
you would on the wall. Rearrange
pieces if necessary to distribute
an even amount of color and texture
in the overall design.
Precut and pre-fit the veneer
panels to fit exact dimensions
of your wall to ensure good fitment
of all pieces. Trimming can be
made using a wet-saw equipped
with a diamond tip blade. Cutting
should always be done outdoors
in a designated safe area. All
edges, corners and seams should
be "tight" fit. There should not
be a visible grout line or mortar
line between each modular panel.
Try not to repeat the same modular
placement row to row, try to overlap
and conceal the seams by staggering
each module. This technique will
ensure a virtually undetectable
and seamless look.
This part may seem very timely
and unproductive but it will actually
save lots of time later when you
are ready to do a final adhesion
onto the wall. |
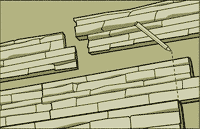
Pre-fit
and precut all the pieces
by arranging a dry layout.
Test fitting will ensure
good fitment of all pieces
during final installation.
. |
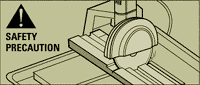
Always
wear protective eyewear
and proper working gear
when operating machinery
and cutting tools.
|
|
Types
of Thin-set Mortar
• Water-Mixed
Mortar: Blend of Portland
cement, sand, additives
and water.
• Latex or Acrylic
Modified Thin-set Mortar:
Similiar to Water-Mixed
but includes additives
to improve adhesion
and reduce water absorption.
• Also consider
using a variety of thin-set
additives to increase
bonding strength to
best suit your need.
|
|
There
are many choices when selecting
adhesives. The first step in choosing
an adhesive is to determine what
type of installation you are doing.
Indoor or Outdoor? Wall or Floor?
And what material is the stone
being applied on? Will the installation
be exposed to heat or moisture?
Knowing some these differences
will help narrow your selection
when choosing the right adhesive
for your job.
The type of adhesive recommended
for most tiling and stonework
is thin-set mortar. Thin-set is
available in pre-mixed containers
or dry compounds. Premixed thin-set
are popular because they are easy
to use and require no additional
mixing and clean up. Mixing your
own thin-set requires more work,
but offers stronger bonding strength
and flexibility.
Begin your stonework by applying
mortar on the bottom and starting
at corner points. Apply 1/2" up
to 3/4" of mortar onto the prepared
surface area using a trowel. Work
in small areas at a time, (5-10
sq ft) so that the mortar does
not begin to set or dry out. Hold
the trowel at 30o angle and use
sweeping strokes to spread mortar
to a consistent depth. Remember
to refer to your dry layout and
visualize where the next piece
will go. Install the veneer panels
once mortar has been applied.
|

Mix
enough mortar to the amount
you think you can use up
in 30 minutes. Excess mortar
will dry up and become unsuitable
for adhesion. Maintain proper
consistency by stirring
the mortar regularly. |
|
| 4.
INSTALLING STONE VENEER PANELS |
|
Reccomended
Tools and Supplies:
• Diamond Blade
Wet-saw
• Power drill with
mortar mixer attachment
• Mixing bucket
• Plaster's trowel
• Margin's trowel
• Mason's trowel
• Caulking gun
• Contractor's
Level
• 25' Tape measure
• Hammer
• Rubber mallet
• Chaulk line
• Putty knife
• Sponge
• Clean-up cloth
• Old tooth brush.
|
|
It
is generally better to start installation
at the bottom first and at corners
or intersections. Start the installation
of the stone veneer by applying
a thin amount of mortar to the
back of the veneer panel. Paste
the veneer panel onto the marked
area of the wall, and onto the
applied mortar layer. Press the
panel firmly into the mortar to
form a thorough bond into the
veneer. Apply enough pressure
so that slight amount of mortar
squeezes out from the back gap.
Tap lightly with a rubber mallet
if needed.
To ensure good adhesion, test
for mortar coverage on a veneer
piece just installed. Pry it out
and look at the bottom. About
75% of the veneer should be covered
with mortar. If less half appears
to be stuck on either surface,
the mortar may be too dry, or
not enough is applied.
After placing the corners and
bottom row of stones, check to
see if the entire row is level
and straight. Fine tune your layout
if necessary by using spacers
to correct unevenness in the wall.
Continue installing onto the next
row, keeping all the joint spaces
tight and with minimum gap. For
tall structures consider using
bracing or metal anchor ties to
hold down the veneer in place
and prevent any movement. Allow
up to 48 hours for the mortar
to cure, and at least 5-7 days
for the entire wall to set-in.
|
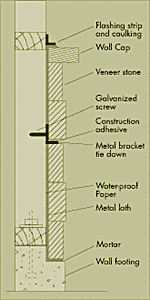
Illus.E.
veneer wall cross section |
Adhere
metal flashing strip and
caulking to seal exposed
areas such as edges and
ends where water damage
may occur.
|
|
| 5.
CLEANING UP AND TOP COAT SEALERS |
|
DO
NOT use to clean veneers:
• Acidic chemicals
or cleaning agents
• Excessive water
hosing
• Power-washing
• Sandblasting
• Wire brush
• Sandpaper
• Chisel or scuffing
tool
|
|
Clean
up spills and droplets of mortar
as soon as possible to prevent
the mortar from staining the surface
of the veneer. Use a wet sponge
to dilute the mortar spill or
lightly brush off hard to reach
areas. To remove stubborn stains
use a mild soap solution and wipe
clean. Do not use harsh chemicals,
as it may create an undesirable
effect. For regular care simply
sweeping away dust and debris
with a broom.
A topcoat sealer can be applied
to enhance a stone's finish and
add extra protection from corrosion.
Test the sealer on a small space
before applying on a large area.
Sealers can be re-applied once
every 2-5 years for further protection. |
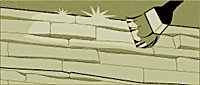
Clear
sealers can beautify and
add further protection
against water damage,
chemical corrosion and
stains.
|
|
- END -
|
Disclaimer:
The following information is not
to be considered as complete installation
procedures. These are basic guidelines
for reference use only. Much of
the information required to thoroughly
complete certain tasks are not
published here in this guide.
Please consult a licensed professional
installer for exact material requirements
and instructions needed to complete
your project. |
|
|
|
|
|
|
|